Ironman Software Forums
Continue the conversion on the Ironman Software forums. Chat with over 1000 users about PowerShell, PowerShell Universal, and PowerShell Pro Tools.

 Discuss this Article
Visual Studio Code provides a great environment for authoring PowerShell scripts. There are a couple of ways to execute PowerShell in Visual Studio Code.
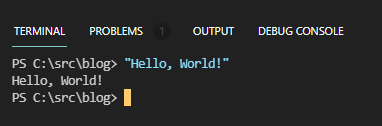
The PowerShell terminal is the default terminal on Windows. You can open a terminal by pressing Ctrl+`. Once the terminal is open, you can run PowerShell commands by typing them in the terminal pressing enter.
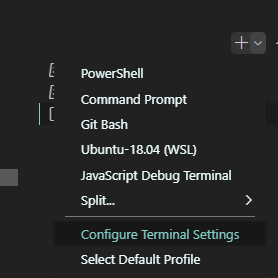
If you are running VS Code on Linux, your default terminal will be Bash. To change to PowerShell, you can modify the Terminal Settings by clicking the drop down in the Terminal and clicking Configure Terminal Settings.
The PowerShell Extension for Visual Studio Code provides a rich editing and debugging experience for scripters in the editor. Once you install the extension, you can create a new PowerShell script by pressing Ctrl+N and then saving it as a PS1 file using Ctrl+S. Once it is saved as a PS1, VS Code will identify the file as a PowerShell script.
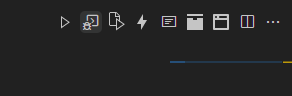
From there, you can execute the PowerShell script by press F5. You can also click the Run button on the top right of the editor.

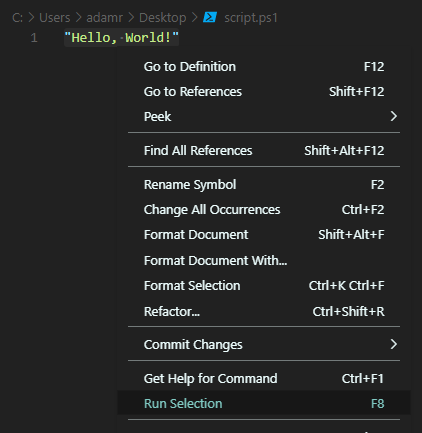
To run a select, you can press F8 or right click on the selection and click the Run Selection option.
PowerShell Pro Tools also provides the ability to run a script in a new terminal. By default, when you use F5 or F8, it will run the scripts in the same terminal. This means that functions, variables and any other entities you have defined within your session will continue to be defined. Running in a new terminal will provide clean environment.
To run in a new terminal, either press Shift+F5 or click the Run in new Terminal button.
Find this useful? Please consider sharing this article. Have a question about PowerShell? Contact us and we'll write a post about it.
Continue the conversion on the Ironman Software forums. Chat with over 1000 users about PowerShell, PowerShell Universal, and PowerShell Pro Tools.