Ironman Software Forums
Continue the conversion on the Ironman Software forums. Chat with over 1000 users about PowerShell, PowerShell Universal, and PowerShell Pro Tools.
 Discuss this Article
PowerShell Universal provides several features that are capable of building web-based forms using PowerShell. For basic forms, we suggest using Universal Automation. For advanced forms, we suggest using Universal Dashboard.
PowerShell Universal Automation can create forms based on the param block of a PowerShell script. There is no need to layout or create a GUI based on your script. Universal Automation supports the following parameter types:
A form can be defined using a basic form such as the following.
param(
    $String,
    [string]$String2,
    [boolean]$Boolean,
    [Switch]$Switch,
    [System.DayOfWeek]$Enumeration,
    [DateTime]$DateTime,
    [int]$Integer
)

$String
$String2
$Switch
$Enumeration
$DatTime
$Integer
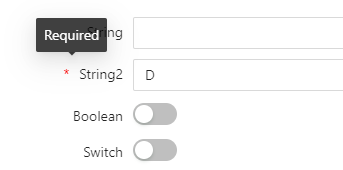
The resulting form will look like this.
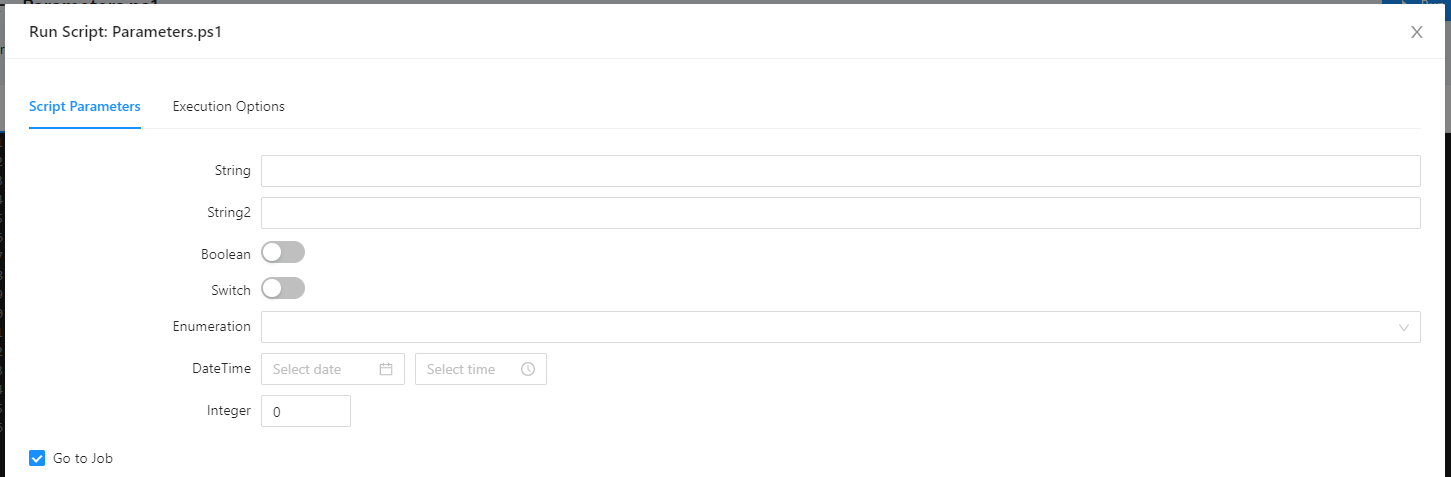
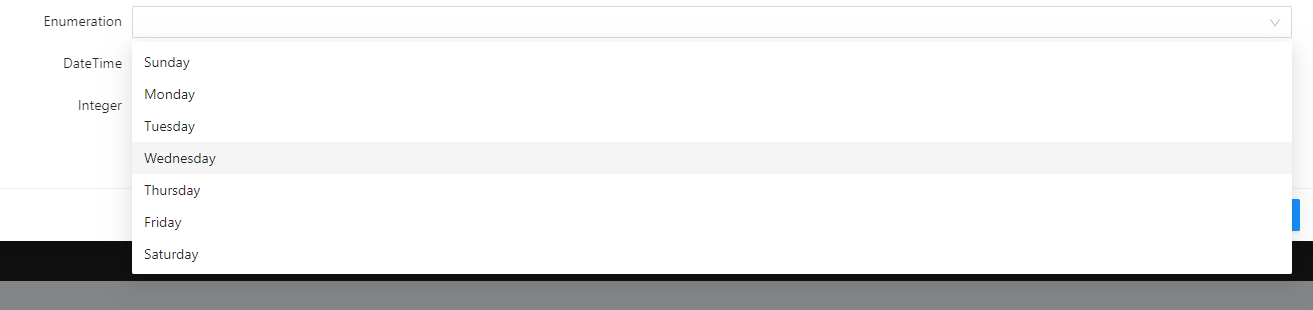
Enumeration values will provide a drop down list that the user can select from.
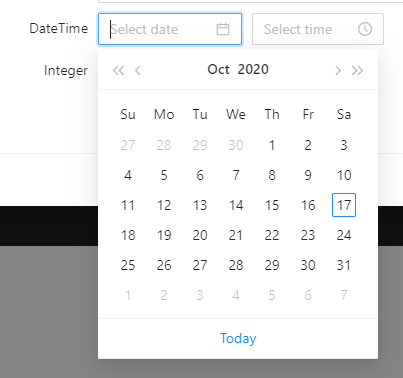
The date and time selector provides date and time pickers.
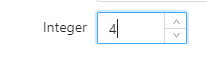
The integer will produce a numeric selector.
Mandatory parameters will be enforced in the UI. If you use a mandatory parameter, the user will not be able to submit the form without entering the value.
param(
    $String,
    [Parameter(Mandatory)]
    [string]$String2,
    [boolean]$Boolean,
    [Switch]$Switch,
    [System.DayOfWeek]$Enumeration,
    [DateTime]$DateTime,
    [int]$Integer
)

$String
$String2
$Switch
$Enumeration
$DatTime
$Integer
Universal Dashboard provides the ability to build complex forms with PowerShell. You can define custom form fields, layouts, validation and processing. Dashboards also support more complex input components such as file upload buttons and sliders.
To build a basic form, add a new dashboard and define a new form. The $EventData parameter will provide a hashtable of all the form data that has been entered by the user. This example uses a single textbox named txtUserName and shows a toast when the user enters some data.
New-UDDashboard -Title 'Form' -Content {
    New-UDForm -Content {
        New-UDTextbox -Id 'txtUserName' -Placeholder 'User Name'
    } -OnSubmit {
        Show-UDToast -Message $EventData.txtUserName
    }
}
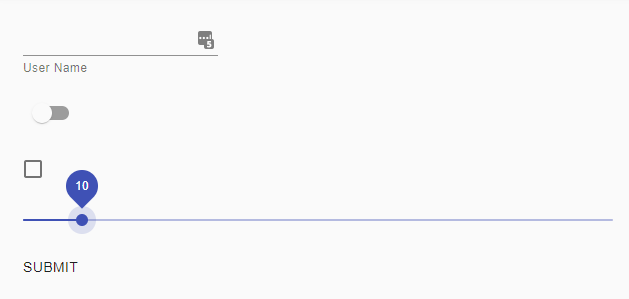
You can use any of the input components to enter data into your form. The ID of the component will be the property of the $EventData hashtable.
New-UDDashboard -Title 'Form' -Content {
    New-UDForm -Content {
        New-UDTextbox -Id 'txtUserName' -Placeholder 'User Name'
        New-UDSwitch -Id 'switch'
        New-UDCheckbox -Id 'checkbox'
        New-UDSlider -Id 'slider'
    } -OnSubmit {
        Show-UDToast -Message $EventData.txtUserName
    }
}
You can upload files using the New-UDUpload component. The file that is uploaded will provide a hashtable that contains the file name, a base64 string of the data and the content type, if it is available.
This example takes the file that is uploaded and saves it into the temp directory.
New-UDDashboard -Title 'Form' -Content {
    New-UDForm -Content {
        New-UDUpload -Id 'myFile' -Text Upload
    } -OnSubmit {
        $Data = $Body | ConvertFrom-Json
        $bytes = [System.Convert]::FromBase64String($Data.myFile.Data)
        [System.IO.File]::WriteAllBytes("$env:temp\$($Data.myFile.Name)", $bytes)
    }
}
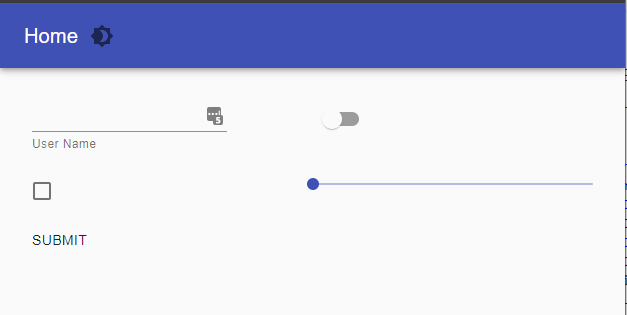
Universal Dashboard supports custom formatting for UDForms. You can use the New-UDGrid, New-UDRow and New-UDColumn within the form’s content. In addition to custom formatting, you can include any other Universal Dashboard component within the forms content. This could include elements like images, chips and avatars.
New-UDDashboard -Title 'Form' -Content {
    New-UDForm -Content {
        New-UDRow -Columns {
            New-UDColumn -SmallSize 6 -Content {
                New-UDTextbox -Id 'txtUserName' -Placeholder 'User Name'
            }
            New-UDColumn -SmallSize 6 -Content {
                New-UDSwitch -Id 'switch'
            }
        }
        New-UDRow -Columns {
            New-UDColumn -SmallSize 6 -Content {
                New-UDCheckbox -Id 'checkbox'
            }
            New-UDColumn -SmallSize 6 -Content {
                New-UDSlider -Id 'slider'
            }
        }
    } -OnSubmit {
        Show-UDToast -Message $EventData.txtUserName
    }
}
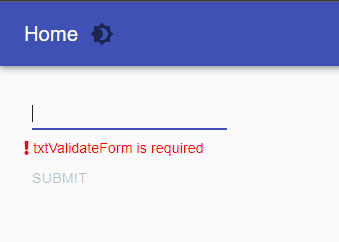
Form validation can be defined with the OnValidate event handler. You can use the $EventData variable to access the current state of the form. Just as with the OnSubmit event handler, the $EventData variable will have a property for each field in the form. You can return whether the form is valid or not using the New-UDFormValidationResult cmdlet.
New-UDDashboard -Title 'Form' -Content {
    New-UDForm -Content {
        New-UDTextbox -Id 'txtValidateForm'
    } -OnValidate {
        $FormContent = $EventData

        if ($FormContent.txtValidateForm -eq $null -or $FormContent.txtValidateForm -eq '') {
            New-UDFormValidationResult -ValidationError "txtValidateForm is required"
        } else {
            New-UDFormValidationResult -Valid
        }
    } -OnSubmit {
        Show-UDToast -Message $Body
    }
}
Forms can return any type of Universal Dashboard content after processing. All you need to do is return a new component from the OnSubmit event handler.
New-UDDashboard -Title 'Form' -Content {
    New-UDForm -Content {
        New-UDTextbox -Id 'gif' -Placeholder 'Giphy'
    } -OnSubmit {
        New-UDImage -Url "https://media.giphy.com/media/$($EventData.gif)/giphy.gif"
    }
}
The stepper control provides a wizard-like experience. You can define pages and validate pages based on the input on previous pages. You can access the $Body variable that contains the value of the current context of the stepper. The $Body variable is a JSON string that contains a context property that includes properties that have been set and the current page the user is on.
A basic stepper controller could look like this. With each step, the next step will display the previous step’s context. When the stepper is finished, the OnFinish event handler will be called. Just as with the OnSubmit event handler for UDForm, you can return content from OnFinish that will replace the stepper.
New-UDDashboard -Title 'Form' -Content {
    New-UDStepper -Steps {
        New-UDStep -OnLoad {
            New-UDElement -tag 'div' -Content { "Step 1" }
            New-UDTextbox -Id 'txtStep1'
        } -Label "Step 1"
        New-UDStep -OnLoad {
            New-UDElement -tag 'div' -Content { "Step 2" }
            New-UDElement -tag 'div' -Content { "Previous data: $Body" }
            New-UDTextbox -Id 'txtStep2'
        } -Label "Step 2"
        New-UDStep -OnLoad {
            New-UDElement -tag 'div' -Content { "Step 3" }
            New-UDElement -tag 'div' -Content { "Previous data: $Body" }
            New-UDTextbox -Id 'txtStep3'
        } -Label "Step 3"
    } -OnFinish {
        New-UDTypography -Text 'Nice! You did it!' -Variant h3
        New-UDElement -Tag 'div' -Id 'result' -Content {$Body}
    }
}

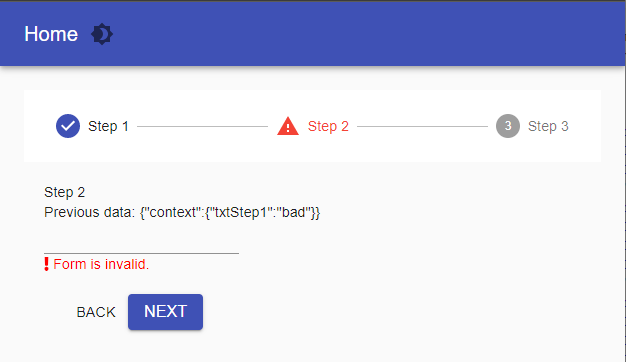
Much like form validation, you can use the OnValidateStep parameter to validate each step. The context will be provided to the event handler and you will be able to validate that step. Users will not be able to advance if the step is invalid.
New-UDStepper -Steps {
    New-UDStep -OnLoad {
        New-UDElement -tag 'div' -Content { "Step 1" }
        New-UDTextbox -Id 'txtStep1'
    } -Label "Step 1"
    New-UDStep -OnLoad {
        New-UDElement -tag 'div' -Content { "Step 2" }
        New-UDElement -tag 'div' -Content { "Previous data: $Body" }
        New-UDTextbox -Id 'txtStep2'
    } -Label "Step 2"
    New-UDStep -OnLoad {
        New-UDElement -tag 'div' -Content { "Step 3" }
        New-UDElement -tag 'div' -Content { "Previous data: $Body" }
        New-UDTextbox -Id 'txtStep3'
    } -Label "Step 3"
} -OnFinish {
    New-UDTypography -Text 'Nice! You did it!' -Variant h3
    New-UDElement -Tag 'div' -Id 'result' -Content {$Body}
} -OnValidateStep {
    $Context = ConvertFrom-Json $Body
    if ($Context.CurrentStep -eq 1 -and $Context.Context.txtStep1 -eq 'bad')
    {
        New-UDValidationResult
    }
    else
    {
        New-UDValidationResult -Valid
    }
}
In addition to basic and advanced forms, you can also create ad-hoc inputs outside of a stepper or form. Here are some examples of ways to use inputs.
This example uses a UDSelect to filter a chart of processes by taking advantage of dynamic regions, Session variables and Sync-UDElement.
New-UDSelect -Option {
    New-UDSelectOption -Name 'Five' -Value 5
    New-UDSelectOption -Name 'Ten' -Value 10
    New-UDSelectOption -Name 'Twenty' -Value 20
} -OnChange {
    $Session:Processes = $Body | ConvertFrom-Json
    Sync-UDElement -Id 'processes'
}

New-UDDynamic -Id 'processes' -Content {
    if (-not $Session:Processes) { $Session:Processes = 5 }

    $Data = Get-Process | Sort-Object -Property CPU -Descending | Select-Object -First $Session:Processes
    New-UDChartJS -Type 'bar' -Data $Data -DataProperty CPU -LabelProperty ProcessName
}
This example manually retrieves a textbox value when the button is clicked.
New-UDTextbox -Id 'txtField' -Placeholder 'Field'
New-UDButton -Text 'Click Me' -OnClick {
    Show-UDToast -Message (Get-UDElement -Id 'txtField').Value
}
This blog post looked at how to create web forms with PowerShell Universal. You can create basic forms using the param block and Universal Automation. You can create more advanced forms with Universal Dashboard using UDForm, UDStepper or ad-hoc input controls.
Download PowerShell Universal today to get started building web-based forms. All the features demonstrated in this blog post are free to use.
Continue the conversion on the Ironman Software forums. Chat with over 1000 users about PowerShell, PowerShell Universal, and PowerShell Pro Tools.