Ironman Software Forums
Continue the conversion on the Ironman Software forums. Chat with over 1000 users about PowerShell, PowerShell Universal, and PowerShell Pro Tools.
 Discuss this Article
Terminal User Interfaces (TUI) have a long history in computing and were some of the first forms of interfaces between human and machine. Sometimes referred to as text-based user interfaces, they are starting to gain popularity again with projects like Terminal.Gui for .NET. In this guide, we take a deep dive into how to build TUIs with PowerShell and Terminal.Gui.
Terminal.Gui is a .NET library for creating robust TUIs. It’s cross-platform and works with various types of terminals. It uses a nested view system that defines basic controls like windows, buttons, labels, and text fields. It also employs an absolute and calculated layout system to easily position controls.
Here’s an example of the PowerShell Pro Tools TUI designer built with Terminal.Gui.
There are a couple ways of installing the Terminal.Gui library but the easiest is to install the Microsoft.PowerShell.ConsoleGuiTools module as it includes the library itself.
Install-Module Microsoft.PowerShell.ConsoleGuiTools
Once the module is installed, you will the need to load the assembly to ensure that the types are available for creating the TUI.
Import-Module Microsoft.PowerShell.ConsoleGuiTools
$module = (Get-Module Microsoft.PowerShell.ConsoleGuiTools -List).ModuleBase
Add-Type -Path (Join-path $module Terminal.Gui.dll)
Terminal.Gui requires that top level application be initialized before developing your TUI. This can be done with the Application class.
[Terminal.Gui.Application]::Init()
Now that the library is loaded and initialized, we can start create our first TUI.
To create a window, we can use the Window class and add it to the top level view of the application. All views share similar properties such as position, size, and sub views.
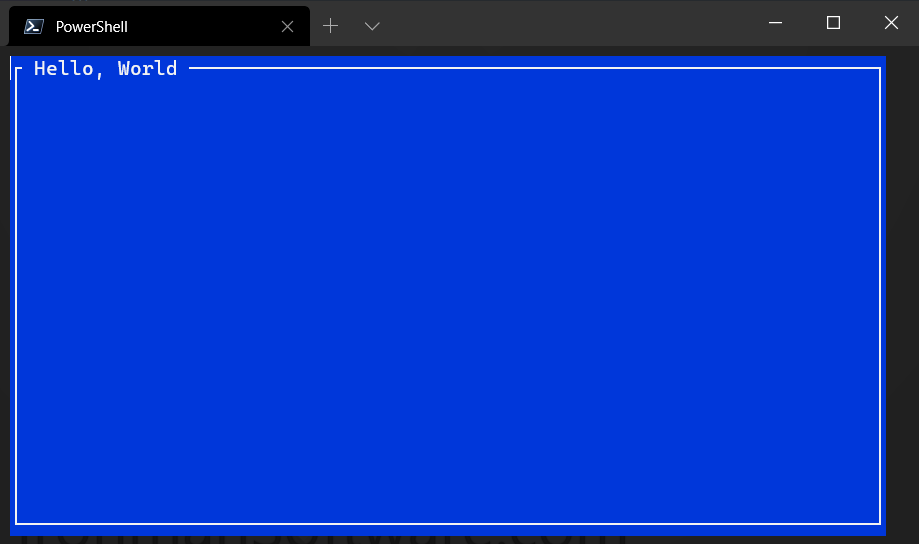
To create a basic window, we can just invoke the default constructor and set it to a variable. Next, we need to add it to the top level view and run the application.
$Window = [Terminal.Gui.Window]::new()
$Window.Title = "Hello, World"
[Terminal.Gui.Application]::Top.Add($Window)
[Terminal.Gui.Application]::Run()
Once the application is run, the TUI will be shown. You can exit it by pressing Ctrl+Q.
Now that we’ve looked at how to create a basic application with a window, we can start to look at different types of views, or controls, to add to your TUIs. Controls need to be added to their superview, like a window, in order for them to be displayed.
This is not a complete list of the available controls. For a complete list, visit the Terminal.Guis GitHub page.
Buttons allow you to provide an interactive experience to your user. You can define a button’s text, action and position within the TUI.
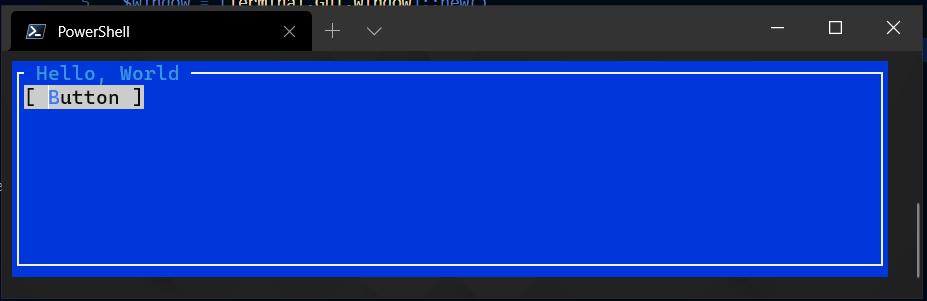
Building on our previous example, we can add a button to a window like this.
$Button = [Terminal.Gui.Button]::new()
$Button.Text = "Button"
$Window.Add($Button)
The resulting TUI will look like this.
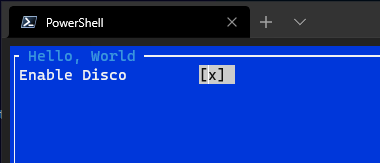
Checkboxes allow for displaying boolean state or providing a way to the user to turn on or off a setting.
This example creates a simple check box with a label.
$Label = [Terminal.Gui.Label]::new()
$Label.Text = "Enable Disco"
$Label.Height = 1
$Label.Width = 20
$Window.Add($Label)

$Checkbox = [Terminal.Gui.Checkbox]::new()
$Checkbox.Checked = $true
$Checkbox.X = [Terminal.Gui.Pos]::Right($Label)
$Window.Add($Checkbox)
Frame views are container views that have a title, border and contain other subviews. They are used to organize regions of your TUI.
This example creates two side-by-side frame views with labels in each.
$Frame1 = [Terminal.Gui.FrameView]::new()
$Frame1.Width = [Terminal.Gui.Dim]::Percent(50)
$Frame1.Height = [Terminal.Gui.Dim]::Fill()
$Frame1.Title = "Frame 1"
$Window.Add($Frame1)

$Frame2 = [Terminal.Gui.FrameView]::new()
$Frame2.Width = [Terminal.Gui.Dim]::Percent(50)
$Frame2.Height = [Terminal.Gui.Dim]::Fill()
$Frame2.X = [Terminal.Gui.Pos]::Right($Frame1)
$Frame2.Title = "Frame 2"
$Window.Add($Frame2)

$Label1 = [Terminal.Gui.Label]::new()
$Label1.Text = "Frame 1 Content"
$Label1.Height = 1
$Label1.Width = 20
$Frame1.Add($Label1)

$Label2 = [Terminal.Gui.Label]::new()
$Label2.Text = "Frame 2 Content"
$Label2.Height = 1
$Label2.Width = 20
$Frame2.Add($Label2)

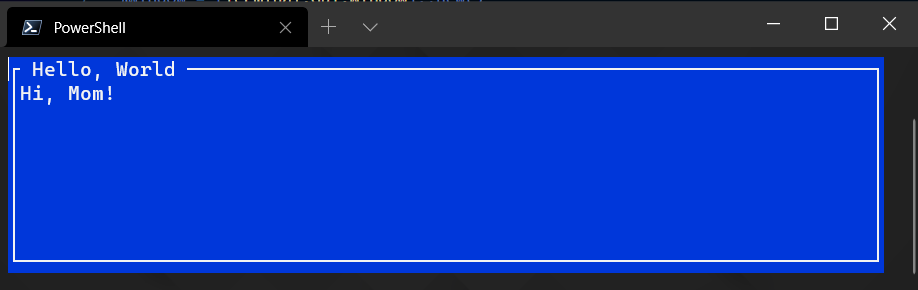
Labels are just text that you can place on your views. For a label to be visible, we need to set the width and height of the view. We’ll talk more about dimensions and sizing in the layout section.
$Label = [Terminal.Gui.Label]::new()
$Label.Text = "Hi, Mom!"
$Label.Width = [Terminal.Gui.Dim]::Fill()
$Label.Height = [Terminal.Gui.Dim]::Fill()
$Window.Add($Label)
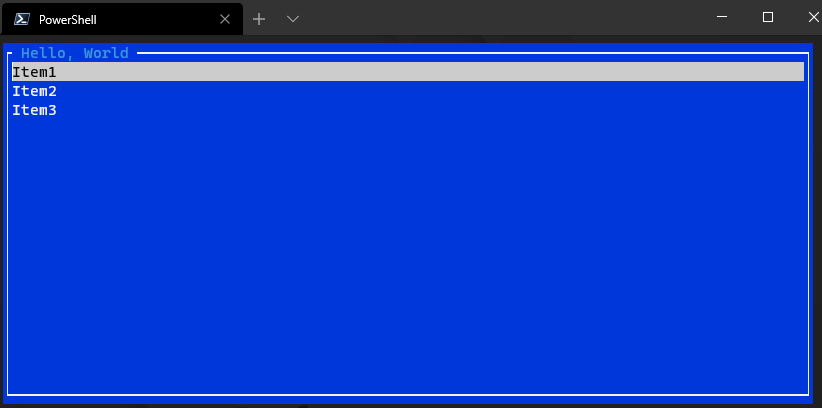
List views allow you to display collections of items in a list. Users can select the items and you can connect event handlers to listen for changes to those selections.
$ListView = [Terminal.Gui.ListView]::new()
$ListView.SetSource(@("Item1", "Item2", "Item3"))
$ListView.Width = [Terminal.Gui.Dim]::Fill()
$ListView.Height = [Terminal.Gui.Dim]::Fill()
$Window.Add($ListView)
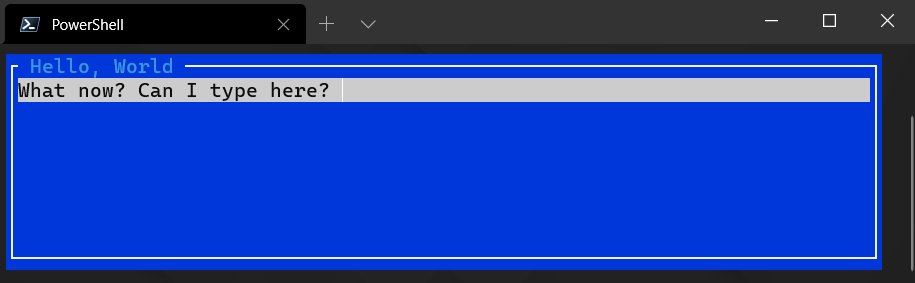
Text fields are used to allow the user to input data. Text fields can also be used with a mask to allow users to enter passwords. Text fields, like other input controls, support tab stops so you can navigate the TUI by using the keyboard.
$Textfield = [Terminal.Gui.Textfield]::new()
$Textfield.Text = "What now?"
$Textfield.Width = [Terminal.Gui.Dim]::Fill()
$Window.Add($Textfield)
There are many other views that you can use with Terminal.Gui. You can learn about all of them on their documentation.
There are various dialog views that you can show over the top of your main window. Dialogs are typically modal and you can allow users to perform specific actions. There are also specific dialogs for opening and saving files.
The MessageBox class can be used to show information and error messages. It’s easy to use and doesn’t require too much code.
The following shows a message box with a title and a message.
[Terminal.Gui.MessageBox]::Query("Hello", "World")
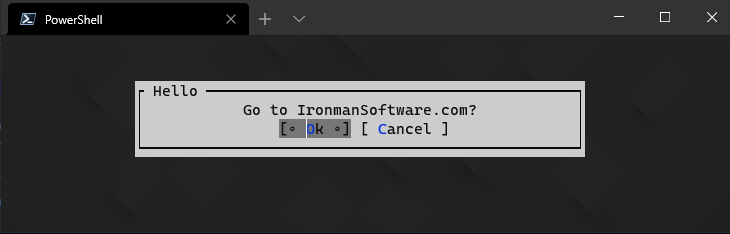
Message boxes can also include buttons and will return the index of the button that was clicked. The below example creates a message box with multiple buttons. If Ok is clicked, the $Result variable will contain 0 and the web site will be opened.
$result = [Terminal.Gui.MessageBox]::Query("Hello", "Go to IronmanSoftware.com?", @("Ok", "Cancel"))
if ($result -eq 0)
{
    Start-Process https://www.ironmansoftware.com
}
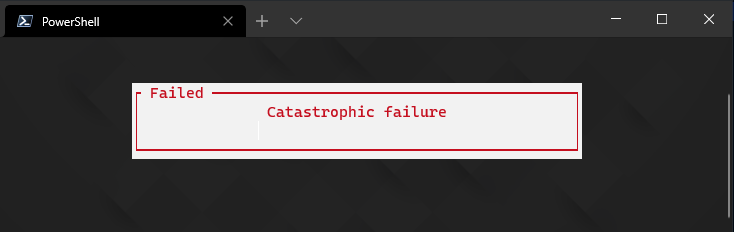
Message boxes can also show errors dialogs. You can use the ErrorQuery to show these types of boxes.
[Terminal.Gui.MessageBox]::ErrorQuery("Failed", "Catastrophic failure");
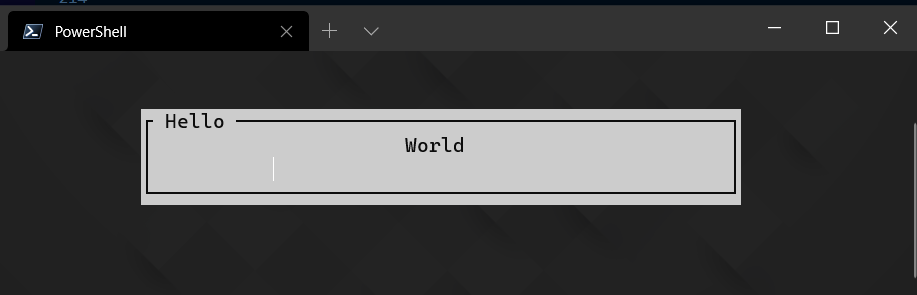
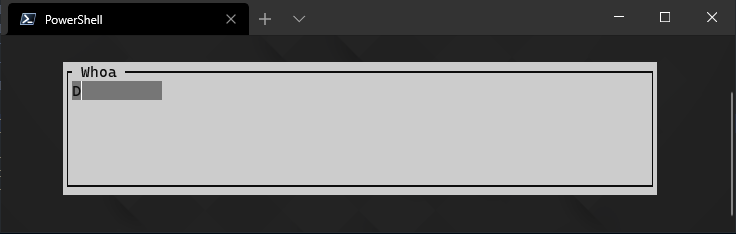
The MessageBox class is a helper for creating dialogs to display simple text and buttons. You can also create dialogs directly. You can still add buttons but you can also add any control you’d like within the content of the dialog.
This example creates a dialog that includes a text field. You need to call [Application]::Run on the dialog in order to show it.
$Dialog = [Terminal.Gui.Dialog]::new()
$Dialog.Title = "Whoa"
$Textfield = [Terminal.Gui.Textfield]::new()
$Textfield.Width = 10
$Dialog.Add($Textfield)
[Terminal.Gui.Application]::Run($Dialog)
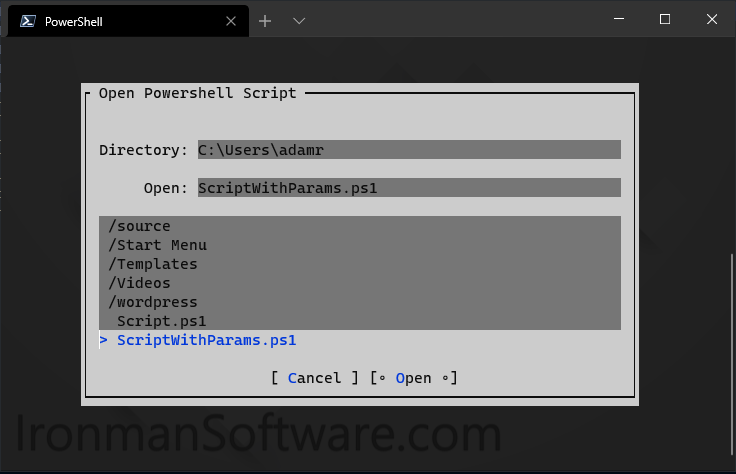
Terminal.Gui also contains specific dialogs for open and saving files and folders. You can customize which folder to open to, whether multiple items can be selected and filter based on file type. The following example creates a open dialog that displays .PS1 files.
$Dialog = [Terminal.Gui.OpenDialog]::new("Open Powershell Script", "")
$Dialog.CanChooseDirectories = $false
$Dialog.CanChooseFiles = $true
$Dialog.AllowsMultipleSelection = $false
$Dialog.AllowedFileTypes = @(".ps1")
[Terminal.Gui.Application]::Run($Dialog)

[Terminal.Gui.MessageBox]::Query("File", $Dialog.FilePath)
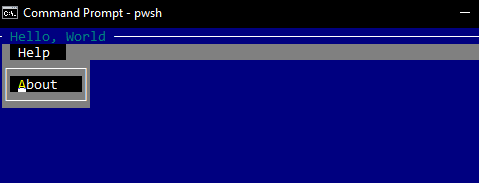
Menus can be added to the top of a window to provide drop down options. Items within the menus can provide actions to take when the menu item is clicked. You can create nested menus that contain sub menu items.
A basic menu can be added by using the MenuBar, MenuBarItem and MenuItem classes.
You can define shortcuts to invoke menu items by including a _ in front of the character.
$MenuItem = [Terminal.Gui.MenuItem]::new("_About", "", { [Terminal.Gui.MessageBox]::Query("About", "Cool Tutorial 1.0") })
$MenuBarItem = [Terminal.Gui.MenuBarItem]::new("Help", @($MenuItem))
$MenuBar = [Terminal.Gui.MenuBar]::new(@($MenuBarItem))
$Window.Add($MenuBar)
As you have seen in some of the examples above, we had to set the dimensions of components in order for them to appear within our window. In addition to controlling dimensions, you can also control positioning using both an absolute and a calculated system.
Sizing controls is done using the Dim class. You can size controls based on an absolute value, the remaining size of the screen or a percentage. The width and height of view can be set using the Width and Height properties.
Absolute sizing can be accomplished using the Dim class or by simply setting an integer value to the dimension you wish to set.
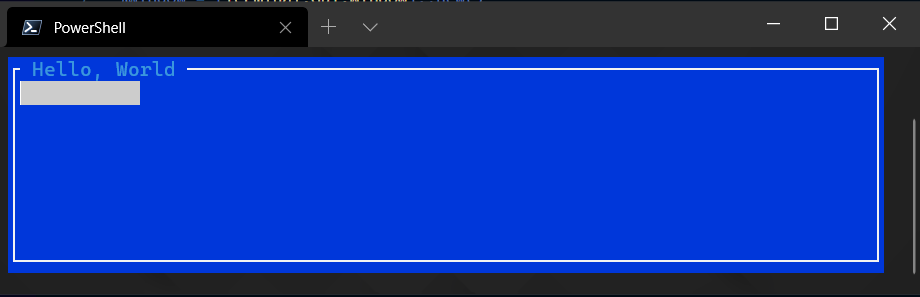
The following example creates a text field that is 5 in width.
$Textfield = [Terminal.Gui.Textfield]::new()
$Textfield.Width = 10
$Window.Add($Textfield)
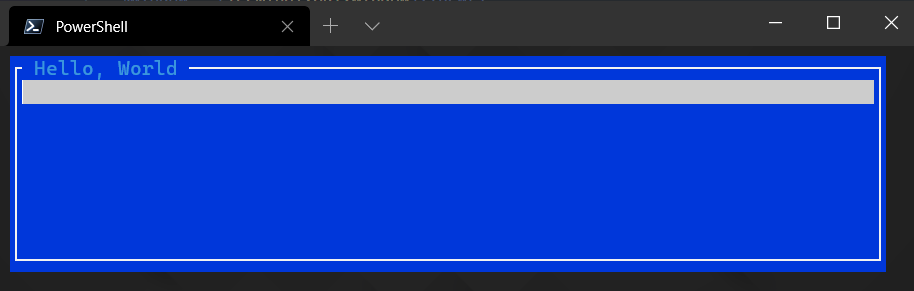
You can use the Fill method of the Dim class to instruct the layout engine to fill the specified dimension with the control. This is useful for making a text field stretch across a window horizontally or stretch a frame view to the bottom of a window.
In this example, we stretch a text field horizontally across a window.
$Textfield = [Terminal.Gui.Textfield]::new()
$Textfield.Width = [Terminal.Gui.Dim]::Fill()
$Window.Add($Textfield)
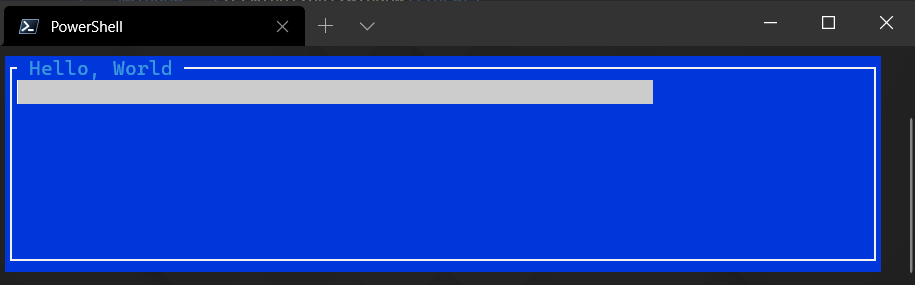
You can set a view to be a percentage of a the super view by using the Dim class. Pass in a value between 0 and 100 to set the percentage.
The following example creates a text field that is 75% of the window.
$Textfield = [Terminal.Gui.Textfield]::new()
$Textfield.Width = [Terminal.Gui.Dim]::Percent(75)
$Window.Add($Textfield)
The absolute layout system can be used by setting the X and Y properties of views. You can use the Pos class or simply set the properties to integers.
The following example positions a button to the 5 and 5 position.
$Button = [Terminal.Gui.Button]::New()
$Button.Text = "Hello"
$Button.X = 5
$Button.Y = 5
$Window.Add($Button)
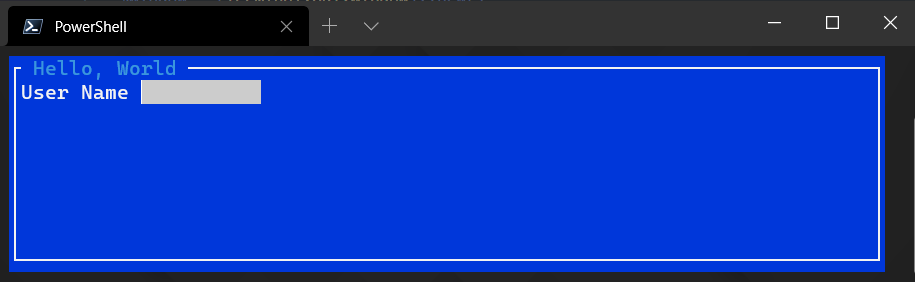
You can position views next to other views using relative positioning. There are methods for each aspect of a component. For example, you could place a text field to the right of a label. The following example does this.
$Label = [Terminal.Gui.Label]::New()
$Label.Text = 'User Name'
$Label.Width = 10
$Label.Height = 1
$Window.Add($Label)

$Textfield = [Terminal.Gui.Textfield]::New()
$Textfield.Width = 10
$Textfield.X = [Terminal.Gui.Pos]::Right($Label)
$Window.Add($Textfield)
Events can be handled by assigning script blocks to event within controls. Controls have events for actions like clicks, keyboard presses, value changes and mouse movements.
Click events can be assigning to the add_Click event handler on views. The most common view to have a click event handler on is a button.
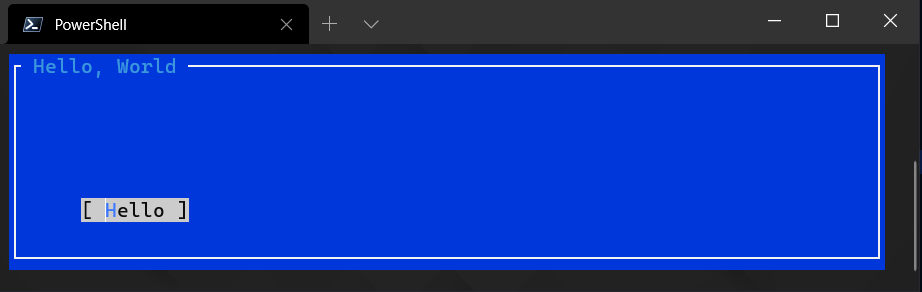
The following example shows a message box when the button is clicked.
$Button = [Terminal.Gui.Button]::new()
$Button.Text = "Click Me"
$Button.add_Clicked({ [Terminal.Gui.MessageBox]::Query("Clicked!", "") })
$Window.Add($Button)
Selection events can take place when a combo box or list view item is selected.
The following example updates a label when the selected item is changed in the list view.
$Label = [Terminal.Gui.Label]::new()
$Label.Width = 10
$Label.Height = 1
$Window.Add($Label)

$ListView = [Terminal.Gui.ListView]::new()
$ListView.Y = [Terminal.Gui.Pos]::Bottom($Label)
$ListView.Width = 10
$ListView.Height = 10
$ListView.SetSource(@("Item1", "Item2", "Item3"))
$ListView.add_SelectedItemChanged({ $Label.Text = $ListView.SelectedItem })
$Window.Add($ListView)
Keyboard events can be gathered at various view levels. To listen to all key presses for a Window, you can assign the add_KeyPress event handler.
The following example updates a label based on the key pressed.
$Label = [Terminal.Gui.Label]::new()
$Label.Width = 10
$Label.Height = 1
$Window.Add($Label)

$Window.add_KeyPress({ param($arg) $Label.Text = $arg.KeyEvent.Key.ToString() })
Much like other display technologies, Terminal.Gui relies on a main thread loop to draw items. Event handlers that are long running will prevent the TUI from rendering and it will appear to freeze when something is happening. You can take advantage of threading to run processes in the background while allowing the UI to stay interactive.
In the following example, we run a background thread job to prevent the event handler from blocking the main thread. This is using the ThreadJob module. Within our job, we need to call MainLoop.Invoke to ensure that the UI can be updated from the background thread.
We have another button that we can try to invoke to ensure that the UI is still responsive.
$Label = [Terminal.Gui.Label]::new()
$Label.Text = "0"
$Label.Height = 1
$Label.Width = 20
$Window.Add($Label)

$Button = [Terminal.Gui.Button]::new()
$Button.X = [Terminal.Gui.Pos]::Right($Label)
$Button.Text = "Start Job"
$Button.add_Clicked({
   Start-ThreadJob {
        $bgLabel = $args[0]
        1..100 | ForEach-Object {
            $Item = $_
            [Terminal.Gui.Application]::MainLoop.Invoke({ $bgLabel.Text = $Item.ToString() })
            Start-Sleep -Milliseconds 1000
        }

   } -ArgumentList $Label
})

$Window.Add($Button)

$Button2 = [Terminal.Gui.Button]::new()
$Button2.X = [Terminal.Gui.Pos]::Right($Button)
$Button2.Text = "Do I work?"
$Button2.add_Clicked({
    [Terminal.Gui.MessageBox]::Query("Still workin'", "")
})

$Window.Add($Button2)
You can set timers to run on an interval and update the UI whenever they are triggered. The below example schedules a timer that updates a label every second.
$Label = [Terminal.Gui.Label]::new()
$Label.Text = "0"
$Label.Height = 1
$Label.Width = 20
$Window.Add($Label)

[Terminal.Gui.Application]::MainLoop.AddTimeout([TimeSpan]::FromSeconds(1), { $Label.Text = (Get-Date).ToString() } );
PowerShell Pro Tools provides a TUI Designer to allow you to visually create interfaces. You can drag and drop controls on the designer surface and set properties of those controls via a property window. The designer generates PowerShell script based on the visually designed TUI.
You can learn more about the designer on our documentation page.
Terminal based user interfaces provide a simple alternative to building basic UIs over your scripts. You can easily integrate them with your existing PowerShell scripts and take advantage of tools like the PowerShell Pro Tools TUI Designer to get started faster.
Continue the conversion on the Ironman Software forums. Chat with over 1000 users about PowerShell, PowerShell Universal, and PowerShell Pro Tools.