Ironman Software Forums
Continue the conversion on the Ironman Software forums. Chat with over 1000 users about PowerShell, PowerShell Universal, and PowerShell Pro Tools.
 Discuss this Article
PowerShell Universal provides a role-based access system for anyone accessing APIs, automation or dashboards. You configure authentication and authorization for the entire system and then can use the roles defined in features throughout the platform.
In this post, we’ll configure some custom roles and then use those roles to control access to elements and pages within a dashboard.
Authentication can be configured in a couple of different ways. Universal supports forms-based, Windows, OpenID Connect and WS-Federation authentication methods. By default, Universal uses form-based authentication. When a user attempts to login, a PowerShell script is called within the Universal platform to validate whether that user has access. The PowerShell script receives a PSCredential object with the username and password.
If you navigate to Settings \ Security and click on the Settings button for the forms-based authentication, you will see this script. By default, a user named admin with any password will be able to login.
param(
    [PSCredential]$Credential
)

#
#   You can call whatever cmdlets you like to conduct authentication here.
#   Just make sure to return the $Result with the Success property set to $true
#

$Result = [Security.AuthenticationResult]::new()
if ($Credential.UserName -eq 'Admin')
{
    $Result.UserName = 'Admin'
    $Result.Success = $true
}
$Result
You can configure this script to authenticate however you like. One common use-case is to authenticate against Active Directory within this script. In our example, let’s allow a couple more users to login. Now, HR and Dev will also be able to login to this PowerShell Universal instance.
param(
    [PSCredential]$Credential
)

#
#   You can call whatever cmdlets you like to conduct authentication here.
#   Just make sure to return the $Result with the Success property set to $true
#

$Result = [Security.AuthenticationResult]::new()
if ($Credential.UserName -eq 'Admin' -or $Credential.UserName -eq 'HR' -or $Credential.UserName -eq 'Dev')
{
    $Result.UserName = $Credential.UserName
    $Result.Success = $true
}
$Result
Note that the authentication settings are stored within the repository folder in the authentication.ps1 file.
Now that we have configured authentication, we can setup a couple of custom roles. Roles are defined on the Roles tab of the Settings \ Security page.
First, let’s add a new role. Click the Add Role button and enter a name and description for the role.

Roles can be assigned statically or through policy. To assign a role to an identity statically, click the Identities tab and assign the role to the user.
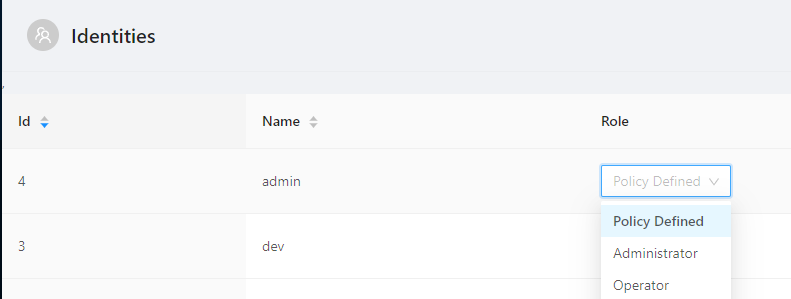
To assign a role by policy, you can click the Edit button next to the role. This will bring up a PowerShell editor where you can define which users will receive this role. An identity can have zero or more roles assigned. The PowerShell script that runs receives a single $User variable that contains information about the user logging in.
The $User variable is a ClaimsPrincipal object. It contains the name of the user along with any claims that may be provided by the authentication method. If you are using something like Windows Authentication or OpenID Connect, you should receive information about the user’s group membership in the list of claims.
Here is the definition for the object you’ll receive.
public class ClaimsPrincipal
{
    public List<Claim> Claims { get; set; } = new List<Claim>();
    public Identity Identity { get; set; } = new Identity();
}

public class Identity
{
    public string Name { get ;set; }
}

public class Claim
{
    public string Type { get; set; }
    public string Value { get; set; }
    public string ValueType { get; set; }
    public string Issuer { get; set; }
    public Dictionary<string, string> Properties { get; set; } = new Dictionary<string, string>();
}
For the purpose of our example, we’ll just look at the identity name to determine if the user will be granted the role.
param(
$User
)

$User.Identity.Name -eq 'HR'
Note that the roles are stored within the repository folder in the roles.ps1 file.
Now that we have our roles configured, we can begin using them in our dashboard. You’ll need to make sure that authentication is configured for your dashboard. To enable authentication, you’ll need a Universal Dashboard or Universal license.
Within an authenticated dashboard script, you’ll automatically have access to a $Roles variable that contains an array of all the roles that the user has been assigned.
This means that you can show and hide components based on a role.
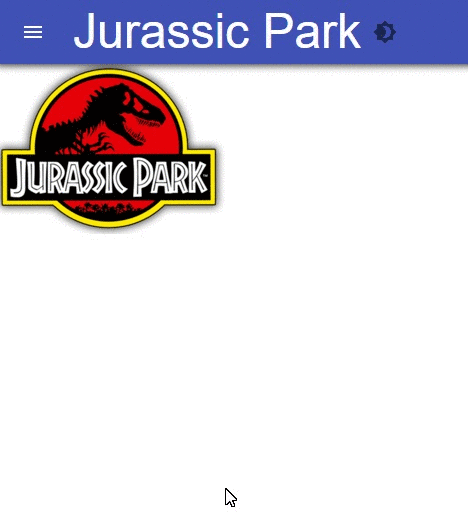
New-UDDashboard -Title "Jurassic Park" -Content {
    if ($Roles -contains 'Engineering')
    {
        New-UDButton -Text 'Start computer'
    }

    if ($Roles -contains 'HR')
    {
        New-UDButton -Text 'Onboard User'
    }


    if ($Roles -contains 'Administrator')
    {
        New-UDButton -Text 'Whte rbt.obj'
    }
}
You can also configure the navigation based on which user is logging in if you are using multiple pages. To do so, use the New-UDAppBar cmdlet with the New-UDDrawer cmdlet to define a custom navigation control that changes based on who is logging in.
function New-AppBar {
    param($Title)

     $Drawer = New-UDDrawer -Children {
        New-UDList -Children {
            if ($Roles -contains 'HR')
            {
                New-UDListItem -Label "Home" -OnClick { Invoke-UDRedirect -Url "/hr" }
            }

            if ($Roles -contains 'Engineering')
            {
                New-UDListItem -Label "Home" -OnClick { Invoke-UDRedirect -Url "/engineering" }
            }

            if ($Roles -contains 'Administrator')
            {
                New-UDListItem -Label "Home" -OnClick { Invoke-UDRedirect -Url "/administrator" }
            }
        }
    }

    New-UDAppbar -Children {
        New-UDTypography -Text $Title -Variant h3
    } -Drawer $Drawer
}
Within each of your pages, you can that use the New-AppBar function to replace the default NavBar with the one that changes based on role. In this example, if a user is does not have the correct role, they will see Dennis Nedry.
$Pages += New-UDPage -Name 'Administrator' -Content {
    if ($Roles -notcontains 'Administrator')
    {
        New-UDImage -Url '/images/Ahahahreal.gif'
    }
    else
    {
        New-AppBar -Title 'Administration'
        New-UDButton -Text 'Restart Power'
    }
}
In this post, we went over how to configure authentication and authorization and use the roles assigned to create a dashboard that adapts based on who is logging in.
Continue the conversion on the Ironman Software forums. Chat with over 1000 users about PowerShell, PowerShell Universal, and PowerShell Pro Tools.