Ironman Software Forums
Continue the conversion on the Ironman Software forums. Chat with over 1000 users about PowerShell, PowerShell Universal, and PowerShell Pro Tools.
 Discuss this Article
Windows Presentation Foundation (WPF) is a technology for building user interfaces using .NET. Just as with Windows Forms, you can build interfaces that work with PowerShell and don’t require the installation of any additional libraries on target machines. You can deploy a PS1 script that contains both the UI code as well as the business logic code for running the scripts you’d like.
In this blog post, we’ll look at the new WPF designer for PSScriptPad and how it integrates into Visual Studio Code. We’ll create a new window, add a couple of controls and then wire up an event handler to handle a button click.
You can view the video version of this tutorial on YouTube.
To create a new WPF window, we will need to create a new XAML file. XAML, or Extensible Application Markup Language, is similar to XML and allows you to define GUIs with a declarative syntax. Unlike Windows Forms, it doesn’t generate the GUI using .NET method calls. Rather, the XAML is read by .NET to produce the class based on the XML definition.
A basic Window looks like this.
<Window xmlns="http://schemas.microsoft.com/winfx/2006/xaml/presentation"
        xmlns:x="http://schemas.microsoft.com/winfx/2006/xaml"
        Width="525"
        Height="350"
        Title="Hello, World">
</Window>
This XAML above creates a simple window with a title and a predefined size. In order to show this Window via PowerShell, we need to load the XAML and produce a Window object that we can use from a script.
Depending on your PowerShell host (ISE vs PowerShell.exe), you may need to load the WPF libraries in order to use the classes required to work with XAML. To do so, you can use the following method call. This will work in Windows PowerShell and PowerShell 7 but not PowerShell 6.
[System.Reflection.Assembly]::LoadWithPartialName("PresentationFramework") | Out-Null
The following function can be used to load a XAML file and produce a window object.
function Import-Xaml {
	[xml]$xaml = Get-Content -Path $PSScriptRoot\window.xaml
	$manager = New-Object System.Xml.XmlNamespaceManager -ArgumentList $xaml.NameTable
	$manager.AddNamespace("x", "http://schemas.microsoft.com/winfx/2006/xaml");
	$xamlReader = New-Object System.Xml.XmlNodeReader $xaml
	[Windows.Markup.XamlReader]::Load($xamlReader)
}
$Window = Import-Xaml
$Window.ShowDialog()
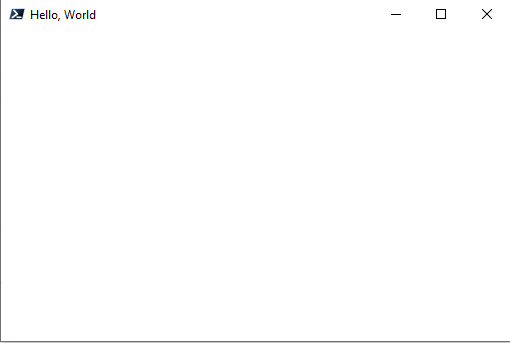
The function reads the window.xaml file and then loads it using the XamlReader class. It returns a Window object that we can then call methods on. The ShowDialog method call will open the window. Running this script should produce a window like this.
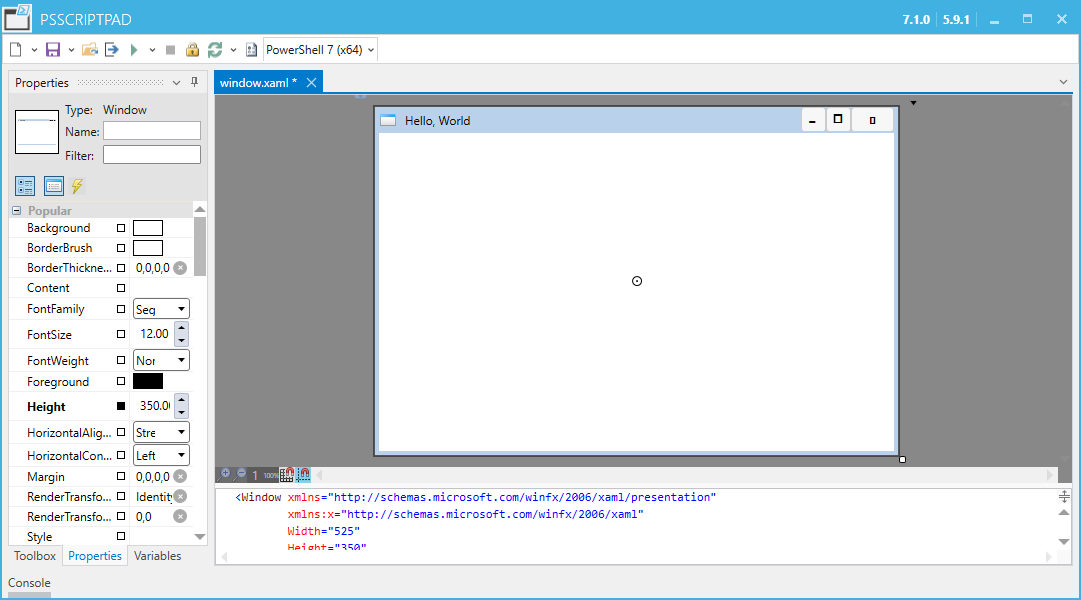
PowerShell Pro Tools provides a drag and drop editor for WPF XAML files. When you install the PowerShell Pro Tools extension for VS Code, it will include a new button at the top of XAML files to show a form designer.

When you click this button, it will open PSScriptPad and present you with the XAML editor for your WPF Window. The top pane shows the current designer view. You can visually drag and resize components within the designer view. The bottom portion provides you with the XAML code so you can quickly make changes and see them reflected in the designer at the top. The Properties panel allows you to set properties of the selected component.
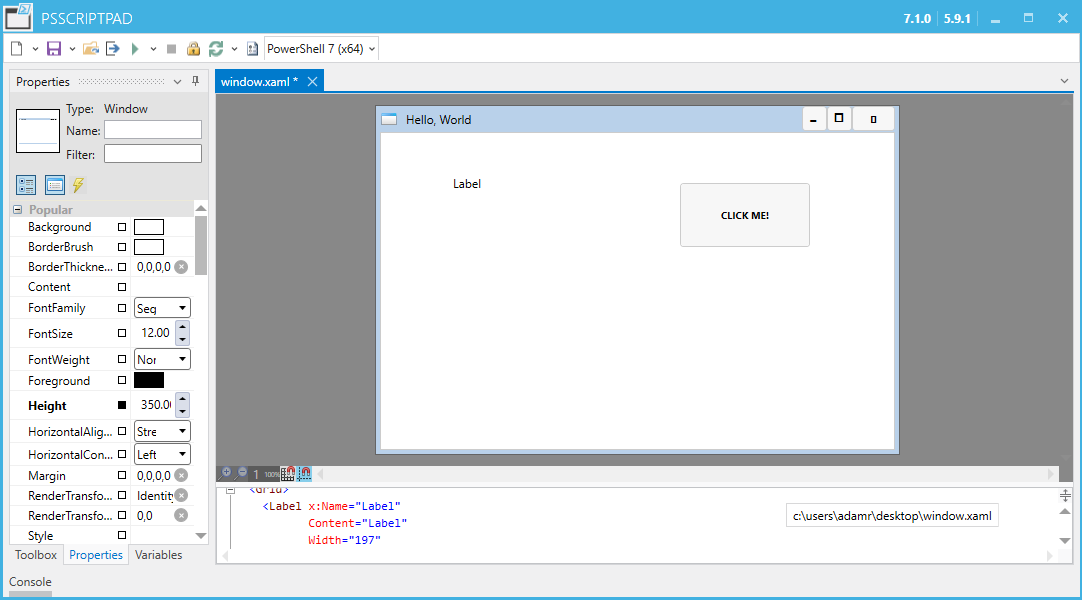
In the bottom pane, we can add a couple of controls using the following XAML. This creates a new Grid with a label and a button.
<Grid>
  <Label x:Name="Label"
          Content="Label"
          Width="197"
          Margin="68,38,0,0"
          HorizontalAlignment="Left"
          VerticalAlignment="Top" />
  <Button x:Name="Button"
          Content="Click Me!"
          Width="130"
          Height="64"
          Margin="300,51,0,0"
          HorizontalAlignment="Left"
          VerticalAlignment="Top"
          Grid.Column="0"
          Grid.Row="0" />
</Grid>
The resulting designer will look like this.
You can run the PS1 file from VS Code to see the updated WPF window.
Now that we have added several controls to the XAML file, we can start to work with those controls within PowerShell. To work with controls in PowerShell, you will need to set the name of the control within the XAML, we’ve done this with the button and label above using the x:Name attribute.
You can find controls within the window using the FindName method. Simply pass in the name of the control and a new object will be returned for that control. To find the button and label, we can find each by name.
$Label = $Window.FindName("Label")
$Button = $Window.FindName('Button')
Now that we have a reference to our button and label controls, we can call method sand set properties of those controls. For the purpose of this example, we are going to add a click handler to the button and update the label when the button is clicked. This code is similar to what you would do within Windows Forms.
When the click the button, it will now set the label’s content to the string Hello.
$Button.add_Click({
    $Label.Content = "Hello"
})
In this blog post, we looked at how to build WPF applications in VS Code with PowerShell. You can define WPF windows with XAML and call those XAML files via PowerShell. You can use the PowerShell Pro Tools WPF designer to set properties and drag and drop controls within your WPF form.
Download PowerShell Pro Tools for Visual Studio Code to get started today.
Continue the conversion on the Ironman Software forums. Chat with over 1000 users about PowerShell, PowerShell Universal, and PowerShell Pro Tools.